Inviting Members to an Organization
Required Permissions
- Organization administrator
Things to Know in Advance
Adding members to an organization proceeds as follows:
- The organization administrator invites teachers or students to the organization
- The invited person signs in via email and approves joining the organization
- If needed, add them to a group at the time of invitation or after they join
Steps
- Open
Affiliations.
- Open the name of the target organization.
- Open
Members.
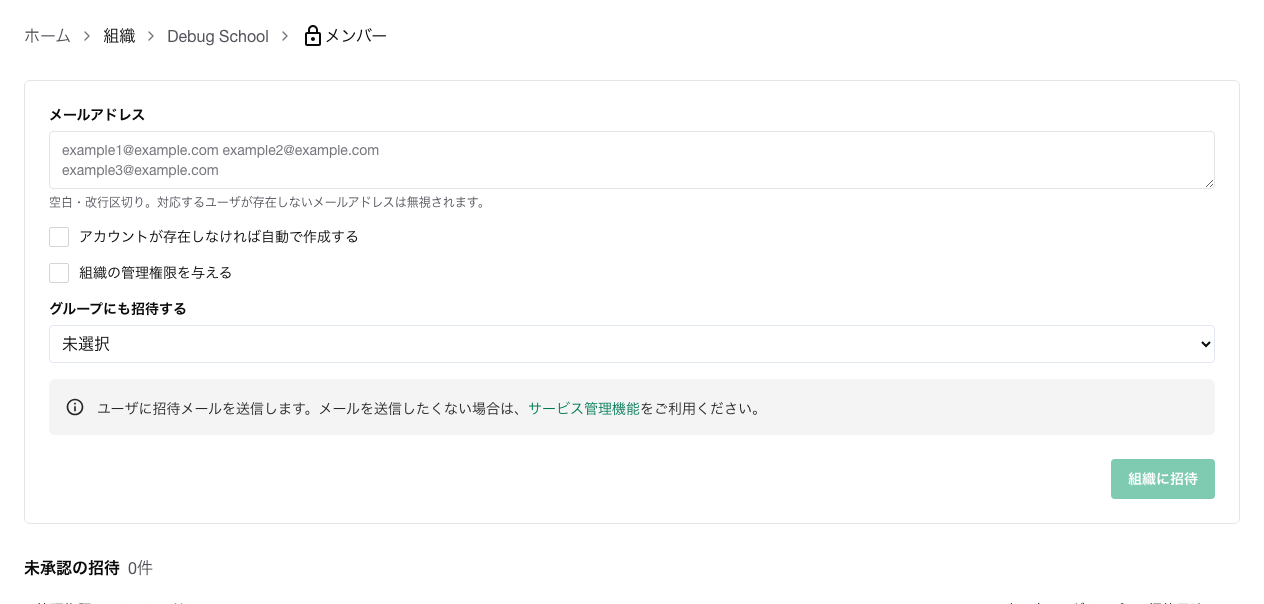
- Enter the email addresses of the teachers or students you want to add.
- If you want to include unregistered email addresses as well, enable
Automatically create accounts if they don't exist.
Grant organization management permissions is a setting that grants organization administrator privileges to the invited users. Do not select it unless necessary.- If you want the invited users to also belong to a group at the same time, select the target group under
Also invite to groups.
- Click
Invite to organization.
What Happens After Inviting
- Immediately after inviting, they will appear in the
Pending invitations list.
- When the invited user signs in via email, they will move to the
Members list.
- If a group was specified, they will also be added to that group after their participation is approved.
Notes
- In principle, do not select
Grant organization management permissions for students.
- If a domain is linked to an organization, users who already have accounts may automatically belong to the organization.
- To prevent omissions when adding members to the organization, it is safer to invite everyone involved in bulk.
- Re-inviting users who are already members or have already been invited will not send duplicate emails.
- Email addresses can be entered in bulk, separated by line breaks or spaces.
Next Steps
